
How to Configure SMTP in Popular Email Clients
Check out the basic settings for popular email clients.
Basic SMTP settings all clients using shared IP platform
SMTP shared IP server: mail.mysmtp.com
mySMTP dedicated IP server: relay1.mysmtp.com (sample - the hostname and IP will be in the setup email)
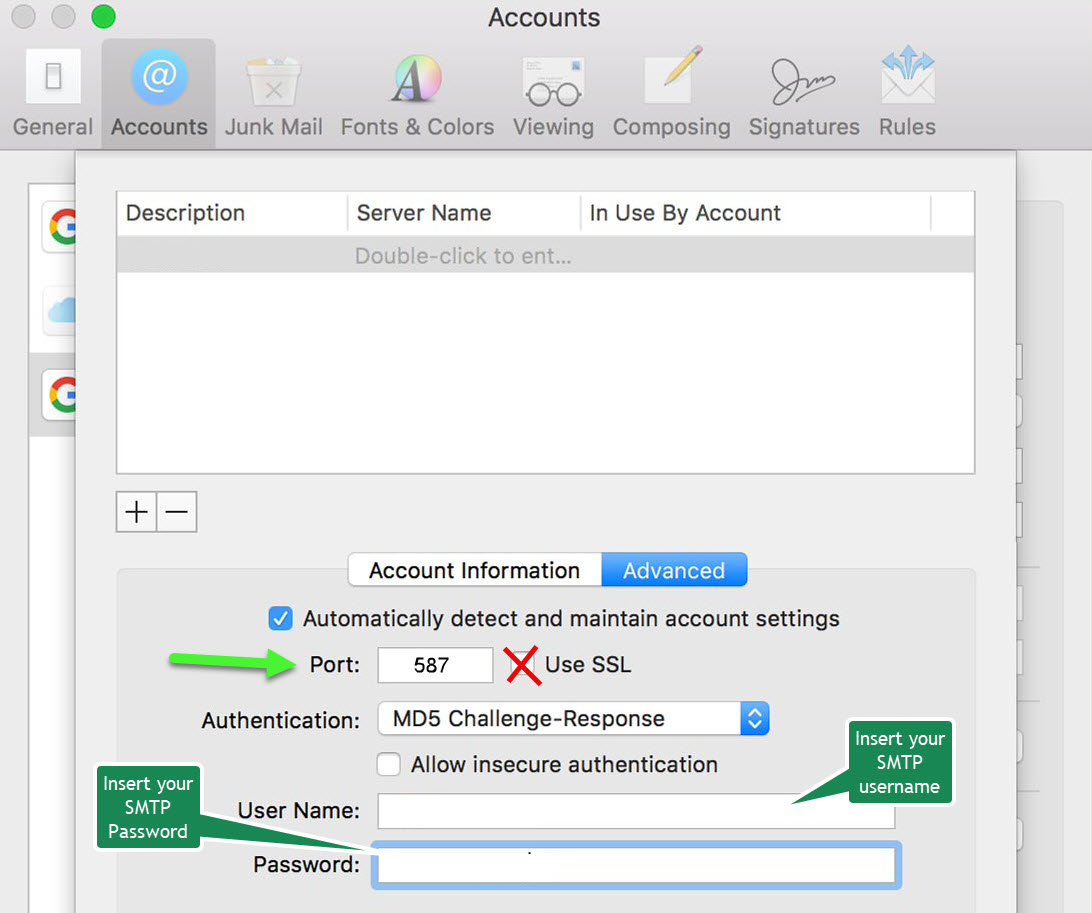
SMTP port: 2525, 25 or primary 587
Turn on SMTP authentication and enter your account’s SMTP username and SMTP password.
For TLS, choose AUTO or STARTTLS
Outlook 2025
The desktop client Outlook 2025 has not yet been announced final, so this is the guide for those testing the BETA version
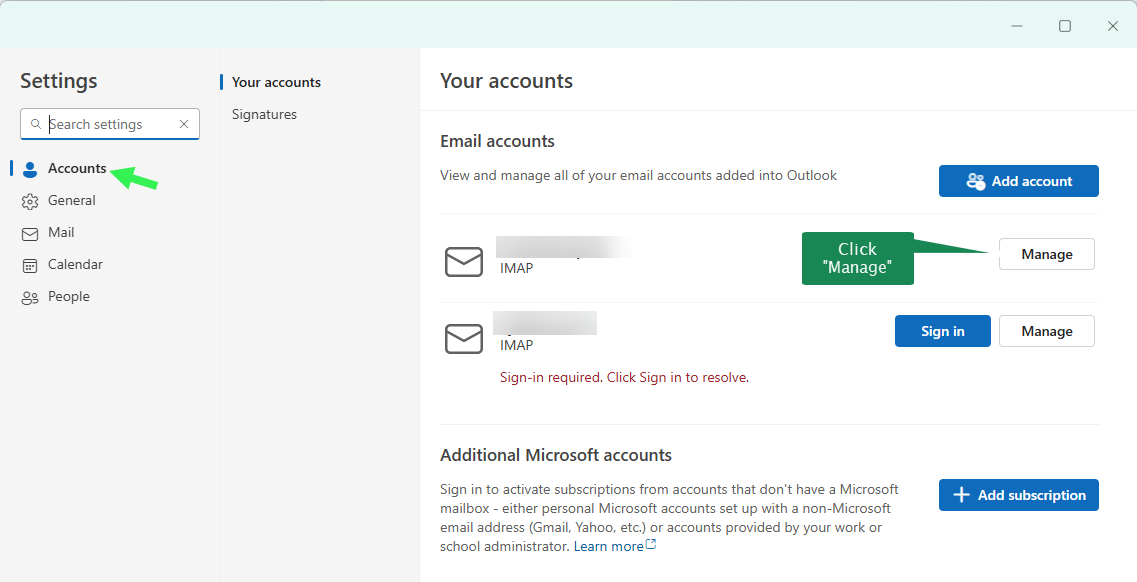
Open Outlook and click the Settings icon and then Manage for the email account you want to use with mySMTP
Type the Password for incoming email to enable account editing
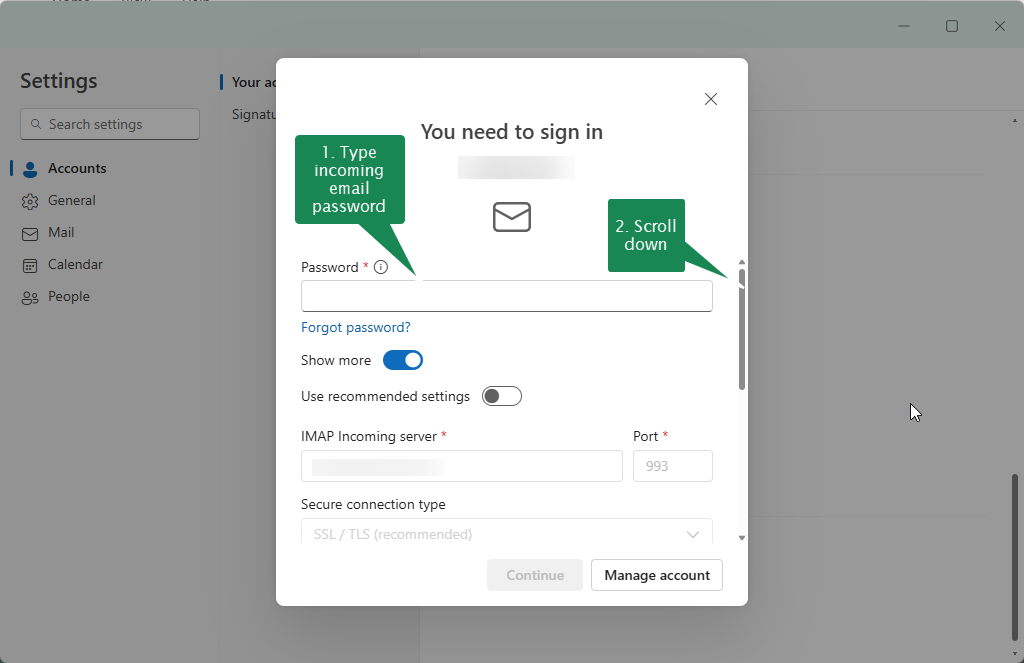
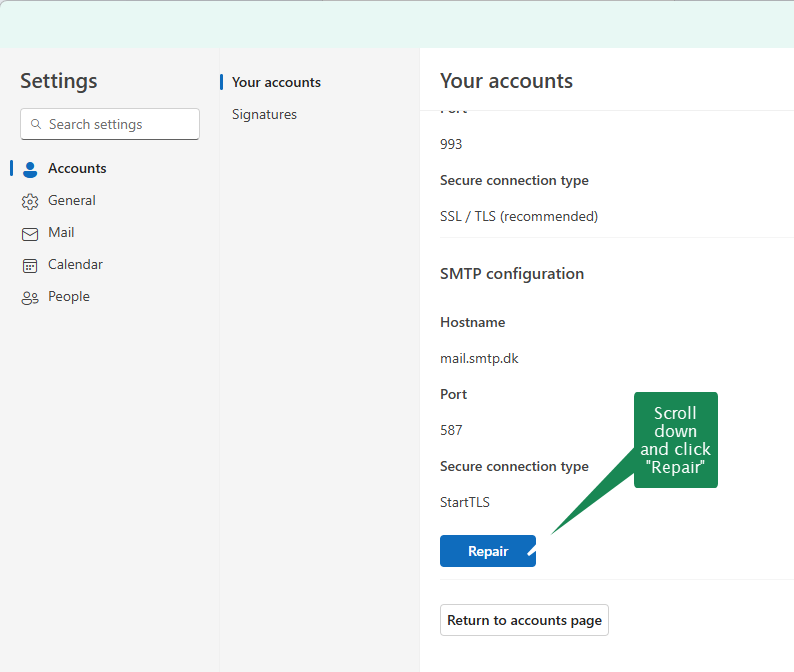
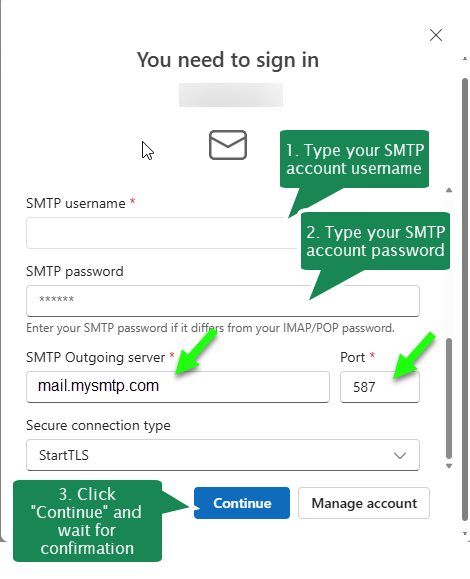
Insert the marked information from your setup email or SMTP account.
Click Continue when done and wait for confirmation.
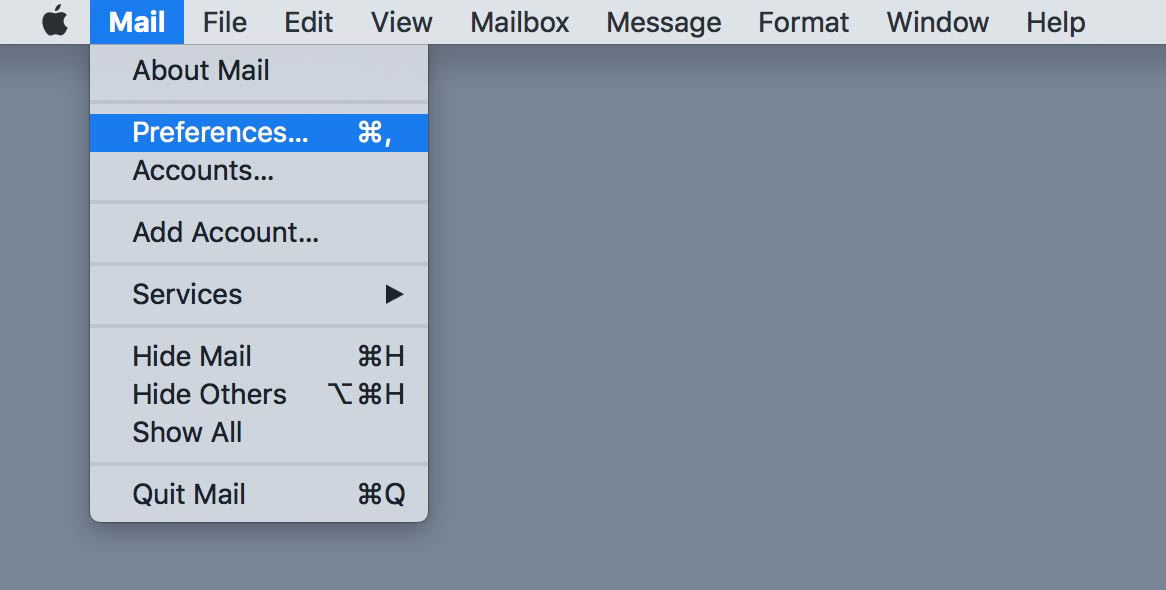
MAC mail 2025
Open Mail and click Preferences
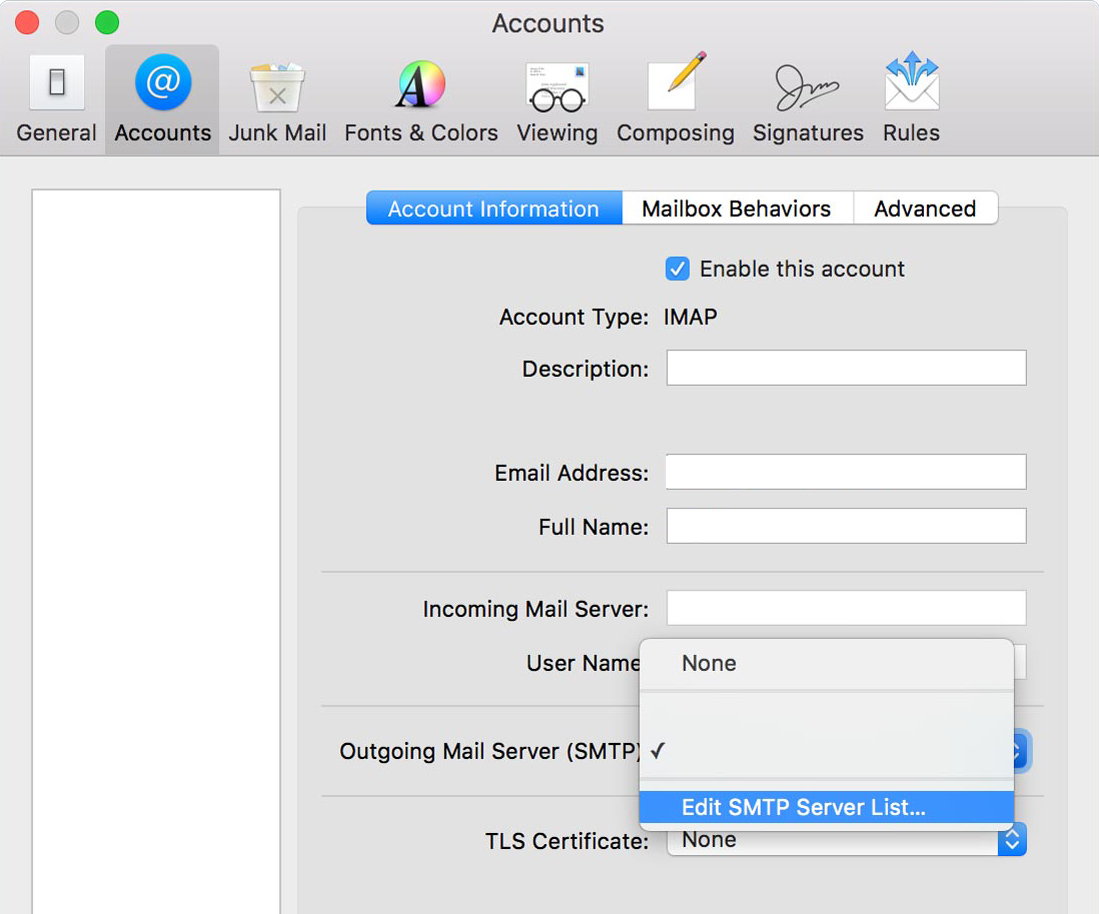
Click Edit SMTP Server List...
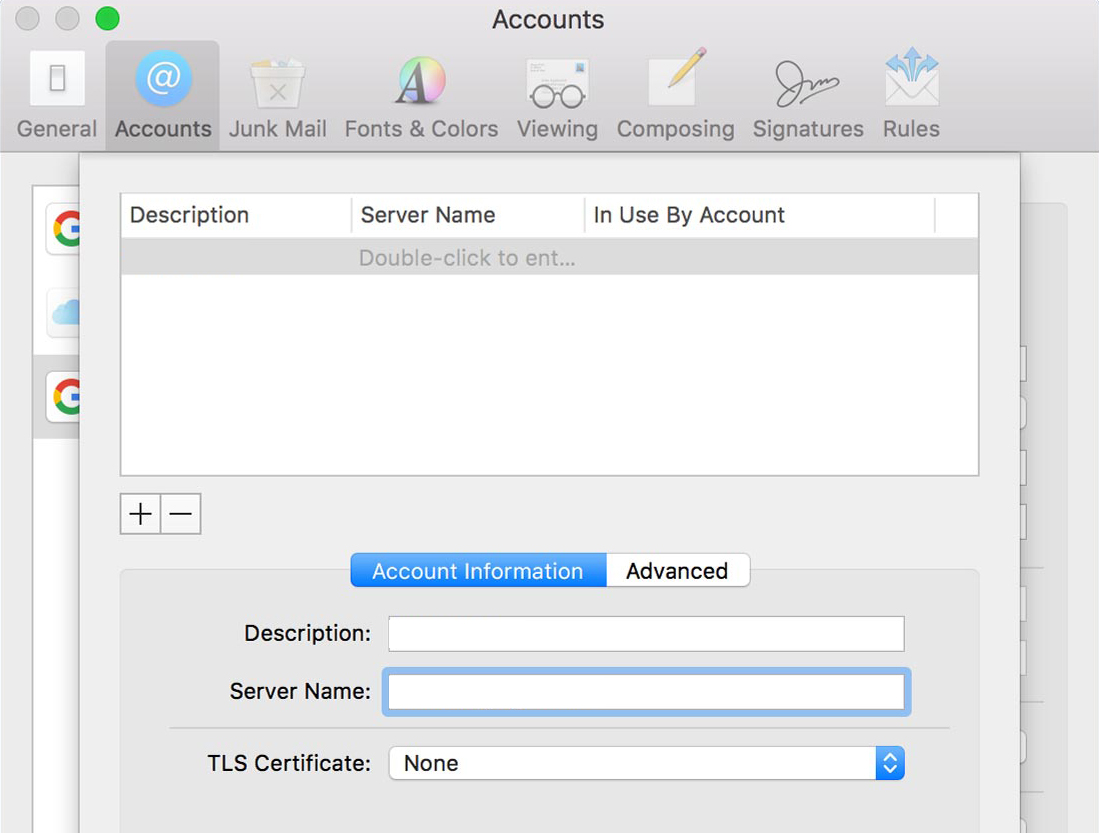
Follow instructions in window
Type in your SMTP login informationband then test
Thunderbird
Open Thunderbird and click to Account Settings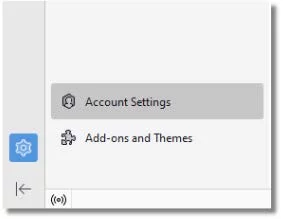
Edit the account you want to use with mySMTP
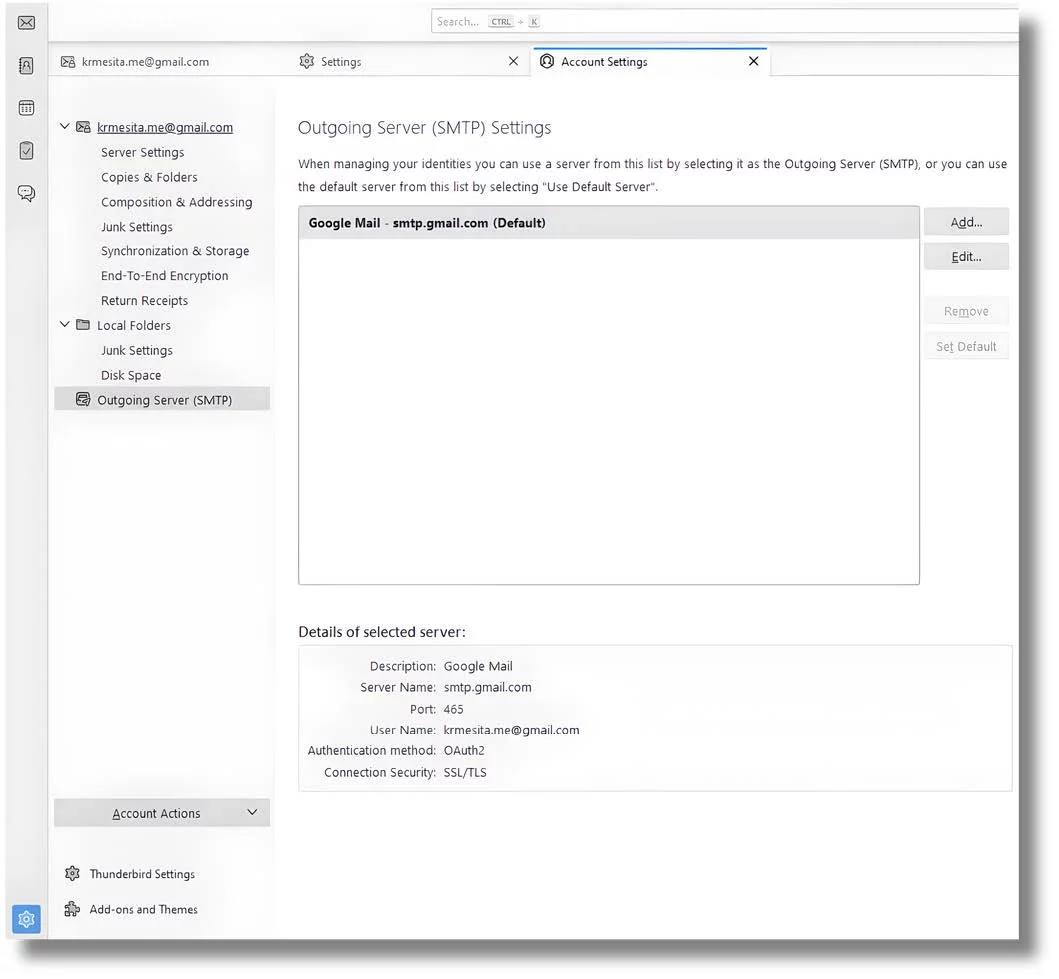
Use the below settings to finalize the SMTP server set up. You need user/password to SMTP server for this
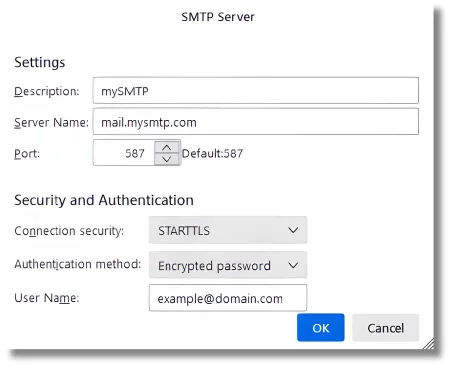
When done, you will be prompted by Thunderbird next time you send an email for the SMTP password. This should happen one time to activate SMTP account.
Connect Microsoft Exchange Server with mySMTP with
How to Connect mySMTP with Microsoft Exchange Server 2019 (Smart Host Setup)
This setup uses a send connector with authentication to relay all outbound mail via relay.xx.xxx (from setup email)
Step 1: Open Exchange Admin Center (EAC)
- Open your browser and go to your Exchange Admin Center:
https://<YourExchangeServer>/ecp> - Log in with admin credentials.
Step 2: Create a New Send Connector
- In the EAC, go to Mail Flow > Send Connectors.
- Click the + (plus) icon to create a new connector.
- Name it mySMTP or similar, and set Type to Internet.
- Click Next.
Step 3: Configure the Smart Host
- On the Network settings screen:
- Select: Route mail through smart hosts
- Click + Add, and enter:
relayxx.xx.xxx (from setup email)
- Click Next.
Step 4: Set Up Authentication
- On the Smart host authentication screen:
- Select: Basic Authentication
- Enter your mySMTP username and password
- Check: ✅ Offer basic authentication only after starting TLS
- Click Next.
Step 5: Source Server
Step 6: Test the Connection
Success Checklist
Connect Android mail to mySMTP
Android Mail – Outgoing SMTP Setup for mySMTP (2025)
Use this guide to send emails using your mySMTP SMTP server from any Android device. You can leave incoming mail settings as-is if you're only using SMTP for sending (e.g., newsletter or notification replies).
Step-by-Step: Outgoing SMTP Configuration
- Open the Mail or Gmail app on your Android device
- Go to Settings > choose the email account to configure (or add a new one if needed)
- Scroll to the Outgoing server settings section
- Enter the following values:
| Setting | Value |
|---|---|
| SMTP Server | relayxx.xx.xxx (from setup email) |
| Port | 587 |
| Security Type | STARTTLS or TLS |
| Require sign-in | Enabled |
| Username | Your mySMTP username |
| Password | Your mySMTP password |
- Tap Next and finish the setup. Gmail may perform a connection test.
🛡️ Important Notes
- Do not use SSL/port 465 — mySMTP requires TLS/port 587
- Make sure the From address belongs to a domain with proper SPF/DKIM/DMARC
- If you're only sending, incoming server fields can be skipped or set to dummy value
No questions yet.